Free U.S. shipping & $12 flat rate international shipping on orders of $150+!
site search

Marketplace

Artisans and designers will post here when they’re about to stock their online stores with new goodies, if they’re having a special sale, opening sign-ups for yarn clubs or releasing a pattern.

Visit the Indie Untangled blog every Friday, where we’ll list the shop updates, sales and events coming up that week. Sign up for the newsletter to have that list sent straight to your inbox.

Are you a dyer, designer or maker? Learn more about advertising on Indie Untangled.

View Posts By Tag

View Posts By Shop

Showing Barbara Benson Designs

I love working with indie dyers because they inspire me towards more creativity. So, when The Fiber Seed approached me with their Swifties program, I jumped at the chance to work with them. Swifties are patterns that are mostly single skein patterns that are designed to be fun and fast to knit up. I started swatching to see what I could come up with and struck upon something that grabbed my attention as I hope it grabs yours.

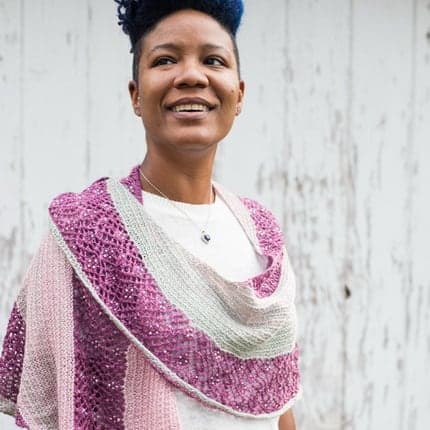
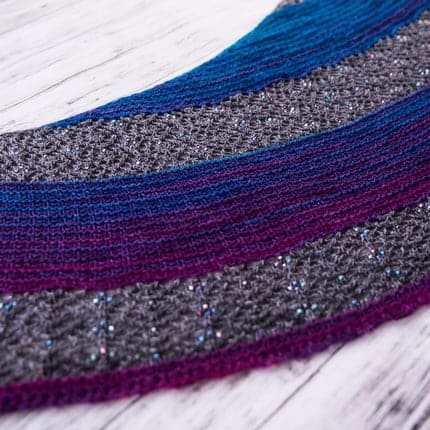
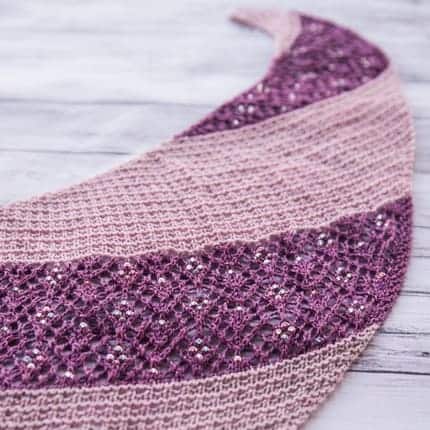
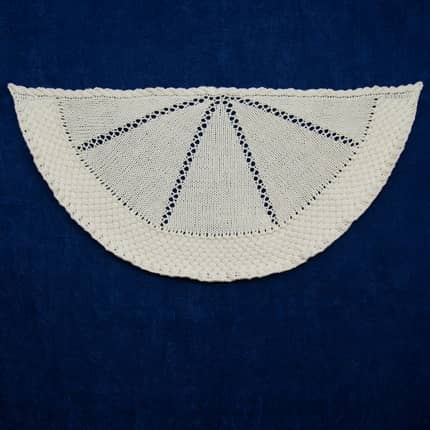
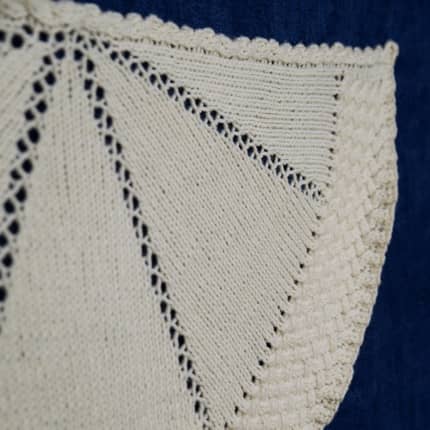
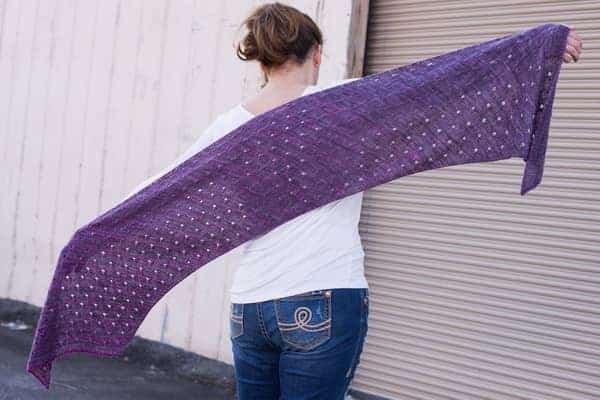
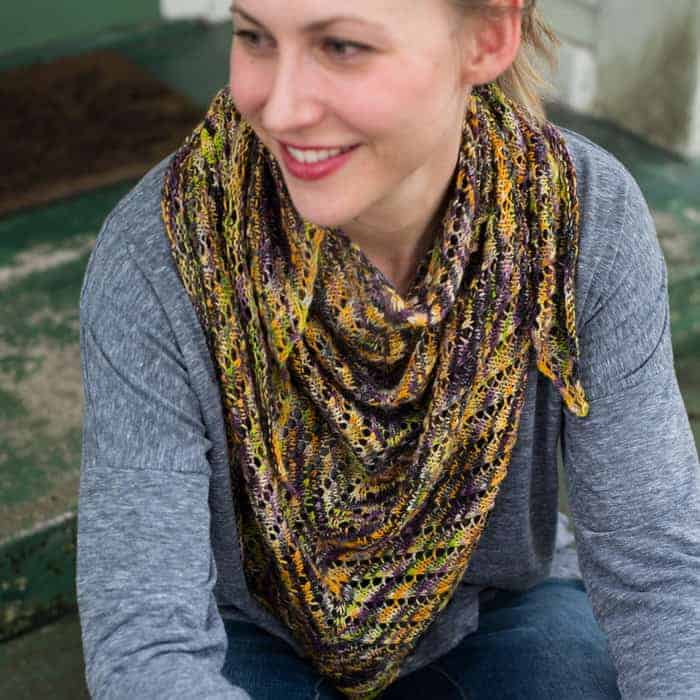
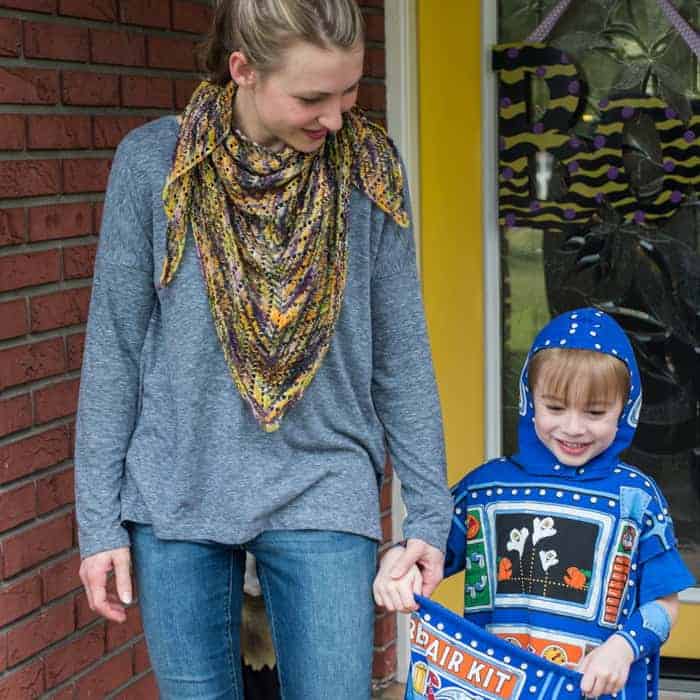
It started as a top down triangle, but I decided to do something a little unorthodox. Instead of mirroring the lace pattern at the spine I decided to see what it looked like if I simply worked the same shaping on both sides of the spine, and it turned out to be magic! The straight rows of lace look like they are going every which way when in fact they are running in the same direction within the panel — it’s just that the panels are oriented differently. This led me to want to also make a three-panel version, which yielded a 3/4 square shawl. I kept the lace simple and geometric because I wanted this lace shawl to be able to handle crazy variegation to highlight one of The Fiber Seed’s beautifully multicolor yarns.

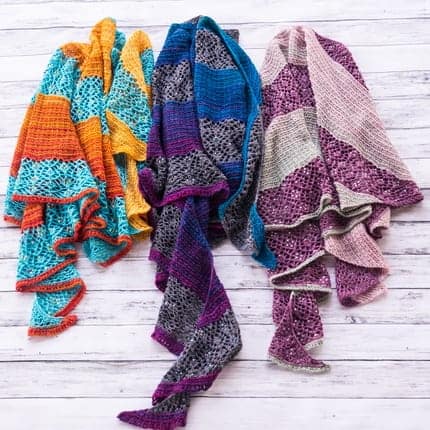
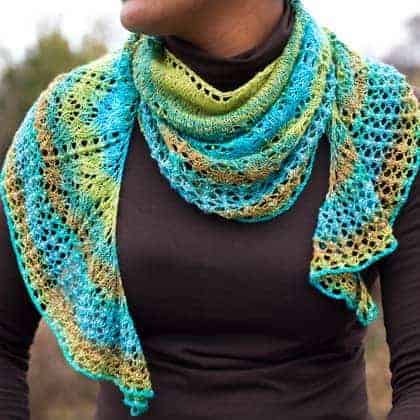
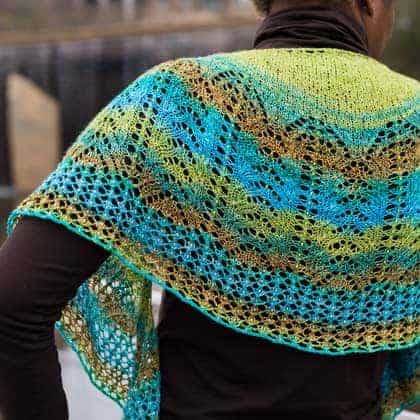
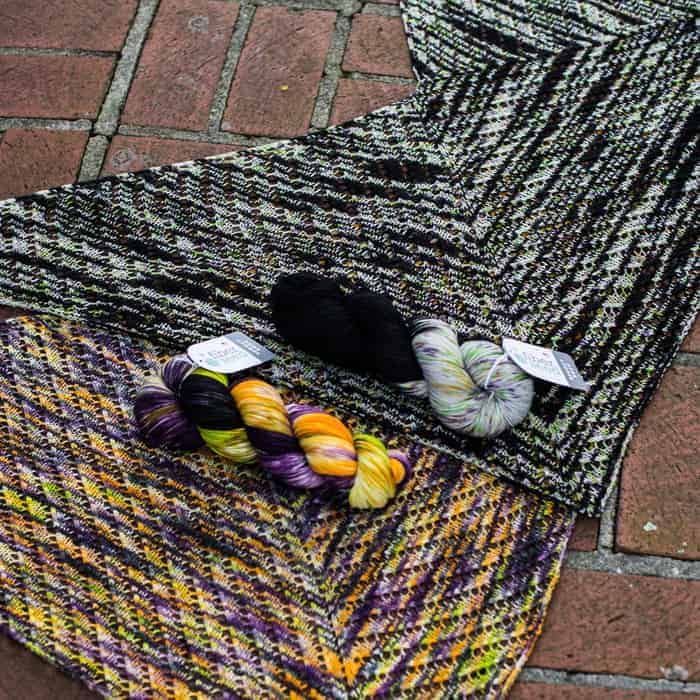
Realizing that I had two shawls to knit gave me the opportunity to do something I have always wanted to do. The Fiber Seed does this really cool and unique thing in that they dye the same colorways using different techniques. What that means is that the colorway has a set combination of colors but the dye genius there combines them in different ways. For the two-panel, top-down triangle version I worked with the color Which Witch Kaleidoscope and for the the three-panel, 3/4 square version I used Which Witch Half Speckled. You can see that they came out very differently, but I think both are beautiful. Of course the shawl will work in any of their solids, semisolids, speckled, dipped or besprinkled colorways and I cannot wait to see how they all look!

When I first handled this new Merino/alpaca blend from Malabrigo, I knew immediately that I wanted it close to my skin. With two skeins of yarn, a cowl seemed to be ideal. Using mosaic colorwork created a beautiful pattern that is deceptively easy to work. All you are doing is knitting stripes and slipping stitches – but it looks much more impressive! And since you are knitting in the round the only purling is for the ribbing at the top and bottom.

The ribbing is worked in a smaller needle to keep it neat and then you go up a couple of needle sizes to allow the slipped stitches to have a little give. When you work mosaic at a tight gauge it becomes a very dense fabric and I wanted to create a tall cowl that would collapse down in waves of softness and color. The more open gauge allowed this to happen and makes the knitting that much faster. The ribbing prevents curling.

I chose to use this soft pink and gray color palette, but you could easily change it up to create an accessory that will blend with your personal style and wardrobe. Luckily this yarn comes in amazing colors!

I love variegated yarn, but it is often difficult to find patterns that really highlight the beauty of these complex combinations. When I developed this particular combination of slipped and lifted stitches it was for a hat worked in solid colors. But as I was knitting it I was thinking “I bet this would work awesome in variegated yarn”. After the hat was completed I asked Lindsay at The Fiber Seed if she had some crazy variegated yarn that I could swatch with and she generously humored me. The swatch came out even better than I had imagined.

The slipped stitches pull the color across the face of the fabric and each stitch pops out in a different burst of color. When striped with a complementary color it truly sings. And the yarn was so perfectly suited for socks that I just had to design a pair. Which honestly, I hadn’t before. I mean I had knit socks but just had never had the urge to design a pair. Until now. Starting toe up you work the in the contrast color and then bring in your variegated yarn. Striping proceeds with the pattern on top and a stockinette sole until you place waste yarn for an afterthought heel.

Then the pattern extends around the leg to mosey on up to contrast ribbing. You pick up around your waste yarn and knit your heel in the contrast color to balance everything out. Then, like all socks, you do it all again, LOL! I am guessing that many of the fans of Indie Untangled might have a few brightly colored skeins of sock yarn tucked away that would be perfect for this pattern. I can’t wait to see them!

In my pattern catalog I have a pair of fingerless mitts that I named “I Can’t Control My Fingers” after the Ramones song that kept running through my head when I was knitting the pattern up. For these mitts I developed a super stretchy texture/ribbing that is really the most stretchiest thing ever. I called it Wobble Rib because it looked wobbly and ever since then I have had it in the back of my mind that I needed to design more in this texture pattern. This desire was also heavily influenced by the fact that I Wanna Be Sedated also contains the lines “I can’t control my brain.” and “I can’t control my toes.”

At the end of this past year all I wanted to knit was something comforting and simple and I realized it was time to put my plan in motion. Once I started knitting the Wobble Rib again I didn’t want to stop. It is so satisfying and the wonderful sport weight Yellowstone from Stitch Sprouts only made it better. One of those “I don’t want to quit knitting” situations. So I extended the length to make a super deep fold up brim that allows pretty much anyone to pull the hat down over their ears and still have a generous brim.

A truly unisex piece, this hat will work in pretty much any color you choose. And should you be the kind of knitter that tinkers you can easily adjust the width by adding/removing in 4 stitch increments as well as adjusting the length to suit your fancy.

When I found out that Anzula was coming out with a bulky yarn in the same delicious Merino/Cashemere/nylon blend as their other yarns I was super excited. I love knitting with chunky yarn because it just goes so fast! I started brainstorming about what I could do and I just kept thinking about big ole chunky cables in big ole chunky yarn. And fast knitting. You know what’s fast to knit? Cowls! So chunky cable cowl it was to be.

But then I wanted the cable to go around instead of vertically, and that involves grafting. I mean, I will graft if I need to but when my goal is fast, grafting doesn’t spring to mind. Then it occurred to me that I could totally fake it. After you have knit the cable from side to side the plan is to pick up and knit the rest of the cowl in the round. The sneaky part is that I decided to overlap the cable a bit. Once that is done I then used the process of sewing on buttons to close up the flap! No button holes, no grafting, all style.

Of course when working with yarn this yummy you don’t always want the knitting to end so I went with a super-sized cowl to keep the chill out. The texture pattern in the body of the cowl brings just enough interest to show off the subtle color changes in the yarn and engage you as a knitter. I went with a unisex color and look but you can knit it in whatever color you want! And make sure to have as much fun as I did picking out buttons.

I love collaborating with other independent business people in this wonderful industry and I am always amazed how much more I can achieve when I work with other brilliant creatives. This new shawl is a prime example of my point. I decided to call it Earthbound Misfit (after my favorite Pink Floyd song Learning to Fly) and it features beautiful custom gradient sets from The Unique Sheep and perfectly matched beads from earthfaire.com.

We start with images and art that have caught our eyes for their color combinations. Once we have narrowed down the candidates Kelly from The Unique Sheep works her magic developing custom colors. Occasionally the colors need to be tweaked until we are all happy — but they are always stunning from the get go. Then the yarn travels to Ellen at earthfaire to be matched up with the perfect beads.

For this shawl I asked her to put together a “bead soup” of multiple different colors that matched the colors that the yarn gradients pass through. By placing these colorful beads on the contrasting color stripe the beads have a big impact with a relatively small number of beads (compared to the size of the shawl). I also wanted to challenge myself to place the beads randomly. I’m not much of a “random” person — but sometimes you just need to loosen up!

Speaking of size, the pattern is designed to have some wiggle room in the amount of yardage you need. We worked with three different fingering weight bases and they each have slightly different yardage. I planned the color changes to occur in the large textured bands and you can fudge the transitions by a couple of rows here and there to match your yarn. The end result is a shawl that takes between 900 and 1000 yards. The resulting shawl measures 24″ X 55″ (61 X 140 cm) but due to the curving shape it wraps around as if it were much larger.

If you are in love with one of these specific color combinations you can get them in kits exclusively from earthfaire.com. You can also pick out your own gradient set from The Unique Sheep in their Luxe, Verve, and Tinsel Toes bases. Just let them know you are making an Earthbound Misfit and I am sure that they can make sure you have the right amount of yarn and a great contrast color. I cannot wait to see all of the different versions of this that might come about. Seeing the three that we created amazed me in how changed the pattern appeared in the different color combinations!

Come learn to fly.

Often using a bulky weight yarn results in a rustic look. That is fantastic, if that is what you are going for. But, it was not what I was going for with this shawl. I wanted something simple and elegant. Something warm that knit up quickly, hence the bulky yarn. But I wanted it to look refined. This refinement started with the ever so soft Crater Lake yarn from Stitch Sprouts. It has wonderful hand and drape and the simple white color of Snow had me well on the way to refined. With swatching, I discovered that this hefty weight made cables with great presence even with a 2/2 cross and the softness and bloom filled the cables in to create a wonderful field of texture in the basket weave pattern.

I didn’t want to cable the whole shawl, but I needed a way to unite a stockinette body with the textured trim. I settled on a cabled selvedge which would be both beautiful and prevent the edge from rolling. Which created the challenge of making the cable run seamlessly along the top edge because the construction was top down. The solution to that is Judy’s Magic Cast on, only worked flat. Not wanting a completely plain field, I chose to highlight the increase lines by making them lace. This wedge increasing eventually transitions into a pi-shawl increase to provide a blank slate (without increases) for the basket-weave trim.

You can easily size the shawl up and down by increasing or decreasing the number of repeats you work of the stockinette body. The rule of thumb to remember is that the trim will take about 50% of your yarn. As written, the body takes about 150 grams of yarn and then the trim takes 150 grams. If you want to knit the body for 200 grams then you will need at least 200 grams for the trim. And of course — since you are changing things on the fly, you might want to have an extra skein, just in case. 😉

Indie dyers really keep designers on their toes. They keep cooking up new and beautiful dying techniques and I feel compelled to try and figure out how to develop a pattern that will be both a fun knit and highlight the amazing yarn. Such is the case with this new shawl. Take the amazing sock blanks that Gale from Gale’s Art keeps creating, they are beautiful works of art on their own.

She takes a knitted blank of stockinette, dyes it in a gradient and then somehow imprints fun motifs onto the fabric. The knitter then knits directly from the unraveling sock blank (or you can ball it up first if you prefer) and the motifs dissolve into a fascinating variegated yarn. Gales primary requests for this shawl were that it have lace and beads.

I think I delivered on both. It is a little tough making sure that the lace pattern has enough solid fabric to show off the yarn as it moves through its gradient, but I chose a wavy, watery pattern to move the bands of color a bit and evoke a sea feeling. And well, I might have gone a bit bonkers with the beads. The trim is intended to evoke a fishermen’s net fresh from the water with sparkling droplets caught in the mesh.

Why a sea theme? Well the sock blank that I used is named Sea Garden and I just went with it! The shawl itself is designed to use up every inch of the yarn, but it is easily adjustable. Both the main and trim motif can be repeated as many or as few times as desired based on your preferences and yardage.

As always, the crescent shape stays nicely on the shoulders and works well wrapped scarf-like. The beads actually help it hang beautifully as an almost jewelry like accessory. The beads are applied with a crochet hook, so you can put on as many or as few as suits your fancy.

This whole gradient thing that is happening in the yarn world is endlessly inspiring. As if yarn wasn’t beautiful enough, dyers had to turn the awesome up to eleven with these shaded combinations of glorious color. Of course, they are a challenge for me as a designer. How can I bring more to the party when such fantastic results can be achieved by simply letting the colors be? Challenge accepted!

This stole is the result of my trying to figure out how to re-envision ways to work with the multi-skein style gradient. Starting with a gorgeous gradient set from Miss Babs (Yummy 2-ply fingering in the color Carmen) I decided to take the colors out of their “order”. If you consider each individual skein as a separate color you can color with them like crayons.

But I still wanted to maintain the gradient nature, so I divided the color range into two halves and used them to create a striping pattern that gradually changed from high contrast to low contrast. Each stripe flowing along the gradient and creating a secondary gradient of diminishing contrast. To allow the yarn to shine I kept both the construction and stitch pattern simple. But not boring.

This rectangular stole is worked on the bias and features a motif that is a combination of slip stitch color-work and lace that is fun and easy to work. After a few repeats you will probably be able to knit with only minimal reference to the instructions. While I fell in love with this purple/pink/gray color combination, I cannot wait to see the other beautiful colors ranges that other knitters choose to work with. I can even see it being done with a solid and gradient. It would even look great in two solids. If you decide to do something different please share your pictures with me!

I am guessing that I am not alone on this, but I am in love with colorfully dyed yarn. A big part of what motivated me into designing in the first place was the desire to allow the yarn to look as beautiful knit up as it does in the skein. And just when I think I have it figured out the amazing artists that dye the yarns come up with new techniques.

Currently occupying my thoughts are the speckle dyed yarns. What do they like? How are they going to behave? Can I convince them to do what I want? This pattern is a result of a long discussion with the skein of yarn that became the cowl. Knit up in the color Meadow from Gale’s Art, I think I managed to achieve my goal of allowing the yarn to shine through while still creating a fun knit.

Combining slipped stitches with a honeycomb style stitch pattern results in a deeply textured fabric that you simply cannot stop squooshing. It is fast and fun to knit so you can make the hat and cowl for yourself and for gifts. Designed for DK weight yarn each piece takes about one skein. During the test knitting process, a couple of my testers chose to use highly variegated sock yarn held double and that worked beautifully too.

For more information on this and other patterns please visit tumpedduck.com.